Routing Options
This property box contains routing options for the Route Entry to Folder activity.
To configure Routing Options
- Add the Route Entry to Folder activity to your workflow definition by dragging it from the Toolbox Pane and dropping it in the Designer Pane.
- Select the activity in the Designer Pane.
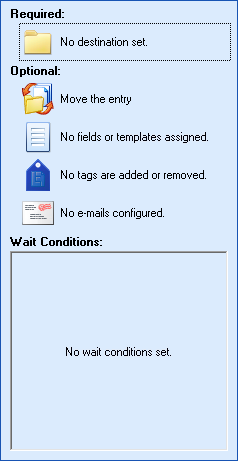
- Under Routing Options in the Properties Pane, click any of the icons to open the
 Routing Activity Options dialog box.
See the following options:
-
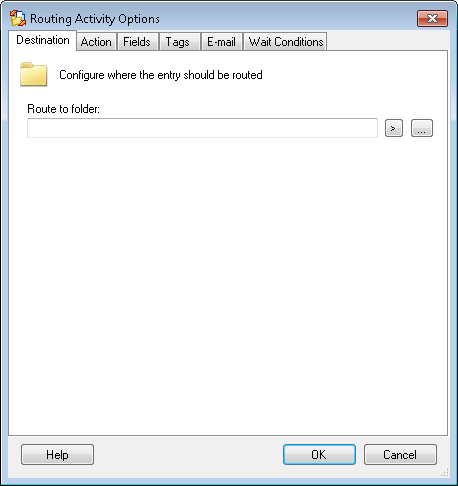
 Destination
This
 tab enables you to configure where an entry is routed. This setting must be configured.
 To open the Destination tab
- Add the Route Entry to Folder activity to your workflow definition by dragging it from the Toolbox Pane and dropping it in the Designer Pane.
- Select the activity in the Designer Pane.
- Under Routing Options in the Properties Pane, click the
 folder icon to open the Destination tab of the Routing Activity Options dialog box.
To configure the Destination tab
-
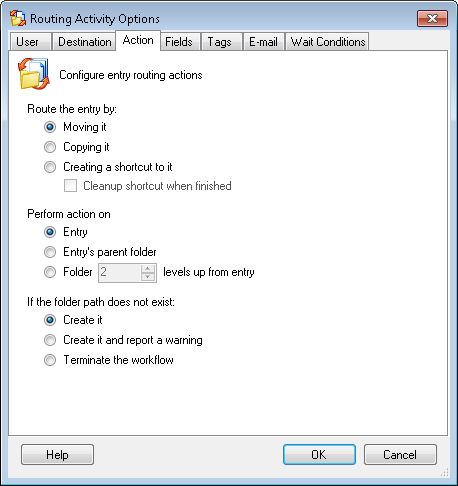
 Action
This
 tab contains routing options for Laserfiche routing activities. It enables you to select the type of action that should be taken on the entry.
To open the Actions tab
- Add a Laserfiche Routing activity to your Workflow Definition by dragging it from the Toolbox Pane and dropping it in the Designer Pane.
- Select the activity in the Designer Pane.
- Under Routing Options in the Properties Pane, click the
 Move the entry icon to open the Actions tab of the Routing Activity Options dialog box.
To configure the Actions tab
- Under
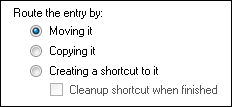
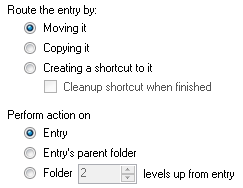
 Route the entry by, select how you want the entry routed.
- Moving the entry relocates it.
- Copying the entry duplicates it.
- Creating a shortcut to it places a shortcut to the entry in the destination specified. Select Cleanup shortcut when finished for the shortcut to be deleted when the routing activity finishes.
Note: You will get a warning message if you select to clean up a shortcut without specifying a wait condition in the Wait Condition tab. Without a wait condition, the shortcut will be deleted immediately after it is created.
- Under
 Perform action on, select which entry this activity will run on.
- Select Entry to perform this activity on the entry specified in the Entry property box.
- Select Entry's parent folder to perform this activity on the folder that contains the entry specified in the Entry property box.
- Select Folder _ levels up from entry to perform this activity on a folder that is a parent, but not the immediate parent, of the entry specified in the Entry property box. Enter the number of levels up the desired folder is.
 Give me an example.
- Under
 If the folder path does not exist, select what should happen if the folder path does not exist.
- Select Create it to create a new folder path.
- Select Create it and report a warning to create a new folder path and display a warning in the Search Results Pane after searching for the specific workflow instance.
- Select Terminate the workflow to end the workflow if it cannot find the folder path. An error will also be displayed in the Search Results Pane after searching for the specific workflow instance.
-
 Fields
This
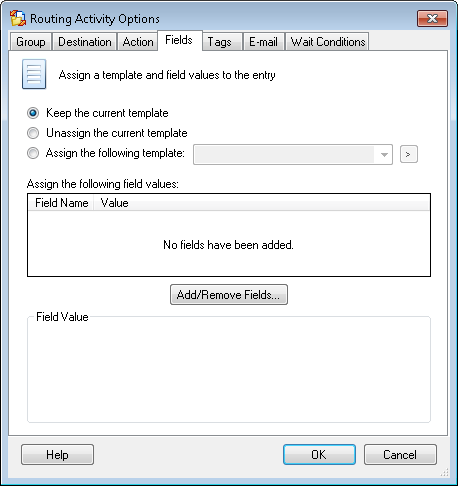
 tab contains options for Laserfiche Routing activities. It enables you to assign a template and/or field values to the entry being routed.
Note: All settings in this tab are optional. If you do not configure any settings in this tab, no templates or fields will be assigned or removed.
To open the Fields tab
- Add a Laserfiche Routing activity to your Workflow Definition by dragging it from the Toolbox Pane and dropping it in the Designer Pane.
- Select the activity in the Designer Pane.
- Under Routing Options in the Properties Pane, click the
 fields icon to open the Fields tab of the Routing Activity Options dialog box.
To configure the Fields tab
- Under
 Assign a template and field values to the entry, select
 - Keep the current template to keep the template currently assigned to the entry.
- Unassign the current template to remove the current template from the entry.
- Assign the following template to select a template to assign to the entry. Use the drop-down menu to choose a template. Alternatively, click the Token button (right arrow)
 to use tokens.
 - Under
 Assign the following field values, click Add/Remove Fields to open the
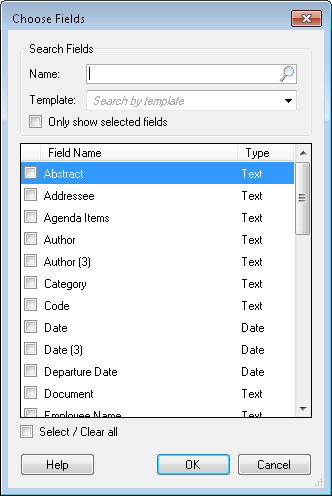
  Choose Fields dialog box and assign a new field.
 - In the Field Name column, select the checkboxes next to the fields you want to add. You can start typing in the Name text box to search by the name of the field, or select a template from the Template drop-down menu to display fields associated with a specific template. You can also select or clear all the fields at once by selecting the Select/Clear all checkbox at the bottom of the dialog box. If you only want to display fields that have been selected, select Only show checked fields. Click OK when finished.
- The fields you selected will appear in the Assign the following field values table. If a field you selected allows multiple values, click
 Append to existing values to access a drop-down menu of for how the Field Value(s) you specify will interact with the multi-valued field.
 - Append your specified field value(s) to existing values.
- Replace existing values with your specified field value(s).
- Clear all values. If you select this option, you will not be able to add field values.
- Under Field Value, enter the text that will be added to the field. Click the Token button (right arrow)
 to use tokens. If the field you selected is a list field, a drop-down menu of the list values will be available by clicking the down arrow
  .
. - Optional: If you are appending or replacing the text of a multi-value field, when you enter a field value, an additional line will appear for you to type additional field values in. As you continue to type field values, additional lines will appear. To reorder the field values you entered, use the green up-and-down arrows
 . To remove a field value from your list, click the red X
  .
.
-
 Tags
Tags
This
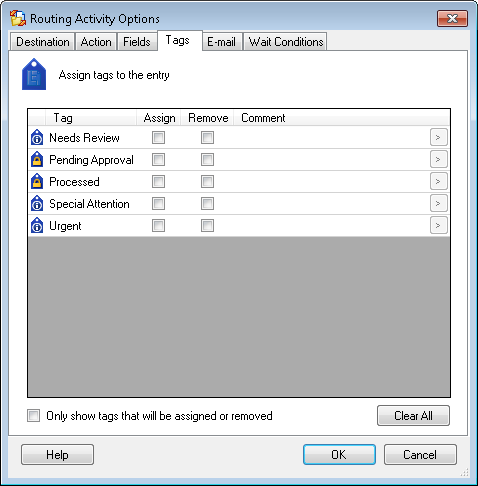
 tab contains options for Laserfiche Routing activities. It enables you to assign tags to, or remove them from, the entry being routed.
Note: All settings in this tab are optional. If none of the settings are configured, no tags will be assigned or removed by this activity.
To open the Tags tab
- Add a Laserfiche Routing activity to your Workflow Definition by dragging it from the Toolbox Pane and dropping it in the Designer Pane.
- Select the activity in the Designer Pane.
- Under Routing Options in the Properties Pane, click the
 tags icon to open the Tags tab of the Routing Activity Options dialog box.
To add/remove tags
- Select either the Assign or Remove checkbox to define which tags will be assigned to, and/or removed from, the entry.
- Optional: You can add comments to tags that are being assigned by clicking inside the Comment area next to the tag. Click the Token button (right arrow)
 to use tokens.
 - Select Only show tags that will be assigned or removed to hide all the tags you did not select to assign or remove.
- To clear all checkboxes, select Clear All.
-
 Email
Email
This
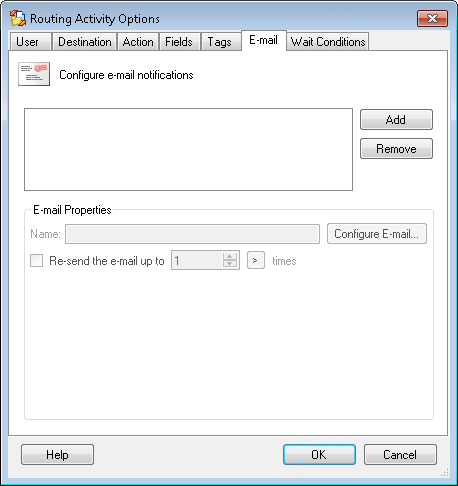
 tab contains options for Laserfiche Routing activities. It enables you to configure an e-mail that will be sent to one or more people. You can configure this tab to send additional e-mail notifications depending on how long it takes for this activity's wait condition to be satisfied.
Example: After routing an entry to a specific person, you can schedule e-mails to be sent to that person based on how long they take to complete the task.
Note: All settings in this tab are optional. If you do not configure this tab, no e-mails are sent as part of this routing activity.
To open the E-Mail tab
- Add a Laserfiche Routing activity to your Workflow Definition by dragging it from the Toolbox Pane and dropping it in the Designer Pane.
- Select the activity in the Designer Pane.
- Under Routing Options in the Properties Pane, click the
 e-mail icon to open the E-mail tab of the Routing Activity Options dialog box.
To configure an e-mail
- Click Add to configure a new e-mail, and an
 e-mail configuration dialog box appears.
- Specify the e-mail's recipient(s) by manually entering e-mail addresses or by clicking the Token button (right arrow)
 to use tokens. Alternatively, click To, CC, and/or BCC. Clicking any of these buttons opens the Find User dialog box which allows you to search for a user.
 - Optional: Configure settings, attachments, and tokens for your e-mail with the following options.
- Click the high priority
 or low priority
  buttons to give your e-mail a priority level.
 - Click Tokens to open the Tokens dialog box. In the Tokens dialog box, select and/or configure tokens to be added to the body of the e-mail. Click OK.
- Click Add Attachment to select an attachment with the New Attachment dialog box.
- Click Advanced to open and configure the Advanced E-mail Settings.
- Click OK.
To change or remove e-mails
- Select an e-mail from the list next to the Add and Remove buttons.
- Rename the selected e-mail by typing a name in the Name text box.
- Click Configure E-mail to modify your e-mail in the e-mail configuration dialog box.
- Click Remove to delete a configured e-mail.
To send escalating e-mail notifications
Note: If you choose to send escalation e-mail notifications, no e-mail is sent initially when the activity runs. The first e-mail is sent based on the Starting after or Starting on time and subsequent e-mails are sent based on the Before sending the next e-mail, wait time.
- Select an e-mail from the list next to the Add and Remove buttons.
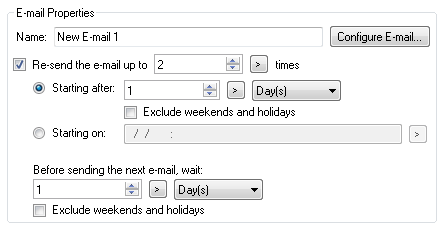
- Select Resend the e-mail up to __ times and type in a number or use the scroll box (up-and-down arrows)
 to specify the maximum number of times the e-mail will be sent. Alternatively, click the Token button (right arrow)
  to use tokens.
  Show me what this looks like.
 - Specify when the first e-mail will be sent by selecting either
- Starting after: Select this option to wait a specific amount of time before sending the first e-mail. Type in a number, click the Token button (right arrow)
 to use tokens, or use the scroll box (up-and-down arrows)
  to specify a length of time. Select Minute(s), Hour(s), or Day(s) from the drop-down menu to specify a unit of time. Check Exclude weekends and holidays to only include business days in the time calculations.
 - Starting on: Type in a date or click the Token button (right arrow)
 to use tokens to specify the date the first e-mail will be sent.
 - Under Before sending the next e-mail, wait, specify the amount of time between when the first e-mail is sent and subsequent e-mails are sent by typing in a number or using the scroll box (up-and-down arrows)
 . Alternatively, click the Token button (right arrow)
  to use tokens. Select Minute(s), Hour(s), or Day(s) from the drop-down menu to specify a unit of time. Check Exclude weekends and holidays to only include weekdays in the time calculations.
Note: The e-mail is sent according to the configured schedule until the routing activity's wait condition is met. Once the wait condition is met, no further e-mails are sent.
Note: See the Holidays node in the Workflow Administration Console to define holiday settings.
-
 Wait Conditions
This
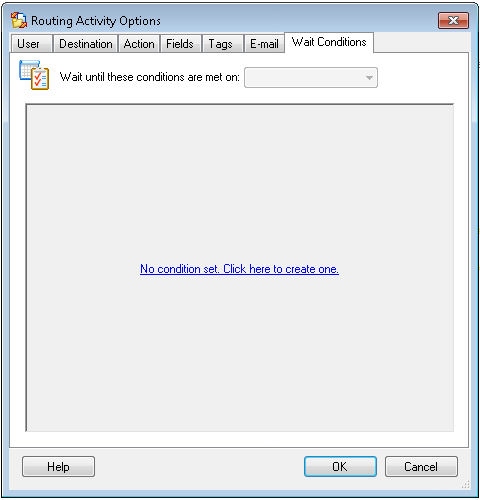
 tab contains options for Laserfiche Routing activities. It enables you to specify wait conditions that must be satisfied before the entry will proceed to the workflow's next activity. If you do not assign wait conditions, the workflow will proceed to the next activity immediately after completing the tasks specified in the other tabs of this activity.
Note: You must assign a wait condition if you want to send additional e-mail notifications using the e-mail scheduling feature of this activity.
To open the Wait Conditions tab
- Add a Laserfiche Routing activity to your Workflow Definition by dragging it from the Toolbox Pane and dropping it in the Designer Pane.
- Select the activity in the Designer Pane.
- Under Routing Options in the Properties Pane, click the
 wait condition box to open the Wait Conditions tab of the Routing Activity Options dialog box.
To configure the Wait Conditions tab
- Click No condition set. Click here to create one.
- A condition editor will appear. Click any underlined text in the condition editor to choose from a variety of condition options. You can create as many conditions as you want by clicking Add condition. Right-click a condition for more options. Learn more about configuring conditions.
- Define for which entry these conditions must be met for the workflow to continue. From the
 top drop-down menu, select one of the following.
- Input entry: The wait conditions must be satisfied for the entry specified in the Entry property box. More information.
- Routed Entry: The wait conditions must be satisfied for the routed copy of, or shortcut to, the input entry as
 defined in the activity's Action tab. (If you chose to move the input entry, the routed entry is the same as the input entry.)
 - Routing Folder: The wait conditions must be met for the folder the routed entry is inside.
Example: Bob wants to route shortcuts of all incoming resumes to the applicants' folders. When an applicant's folder also contains an entry named Recommendations, he wants the workflow to continue. In this situation, Bob selects Route the entry by Creating a shortcut to it and Perform action on Entry in the Action tab. In the Wait Condition tab, he selects Routing Folder and specifies that the folder must contain an entry named Recommendations for the workflow to continue.
 to
to 